


There’s something truly magical about the aroma of freshly baked bread wafting through your home.
This artisan homemade bread recipe promises to deliver that magic, transforming simple ingredients into something extraordinary.
I discovered the joy of bread making while exploring small bakeries in France, where each loaf was crafted with love and tradition.
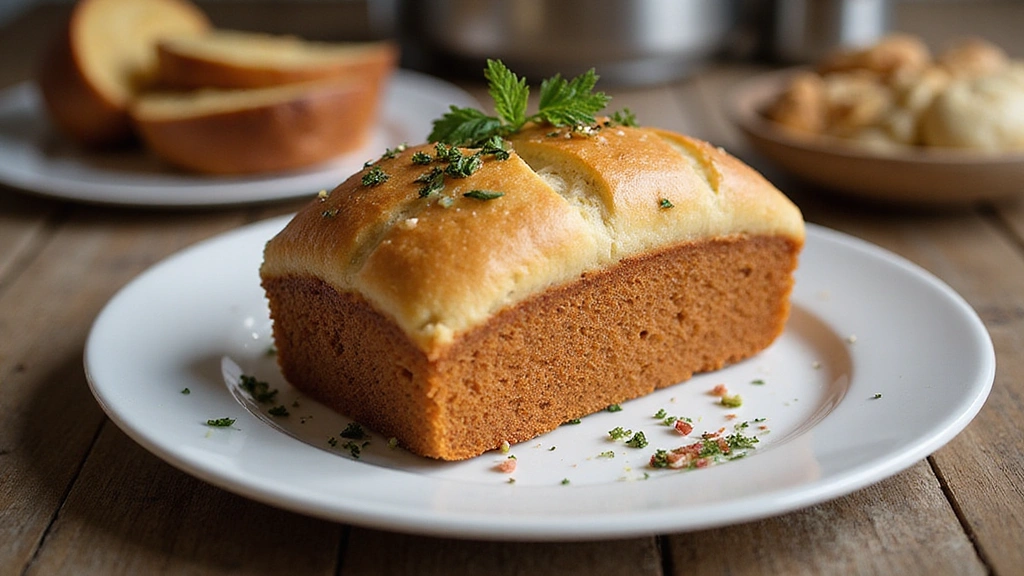
The crusty exterior and soft, airy interior make this bread a delightful experience for any bread lover.
Whether you’re new to bread making or a seasoned baker, this recipe offers a rewarding challenge with impressive results.
The History and Cultural Significance
• Bread Recipes Homemade traces its origins to ancient Egypt, where it was originally created by early bakers who discovered the fermentation process.
• The dish evolved over decades as techniques like kneading and proofing were refined, eventually becoming the beloved version we know today.
• In many cultures, this dish traditionally appears at festive gatherings and family meals, symbolizing sustenance and community.
• While many variations exist across different regions, the authentic version maintains a chewy crumb and crispy crust that sets it apart from imitations.
Recipe Overview
Nutritional Information
Essential Equipment Guide
Mixing Bowl: A large mixing bowl is essential for combining ingredients and allowing the dough to rise. Look for a bowl that is large enough to accommodate the dough as it doubles in size.
Bench Scraper: This tool is invaluable for handling sticky dough and shaping it without adding extra flour. Look for a scraper with a comfortable grip and a sharp edge.
Baking Stone: A baking stone helps create a crispy crust by evenly distributing heat. Alternatives include a heavy-duty baking sheet, but ensure it can withstand high temperatures.
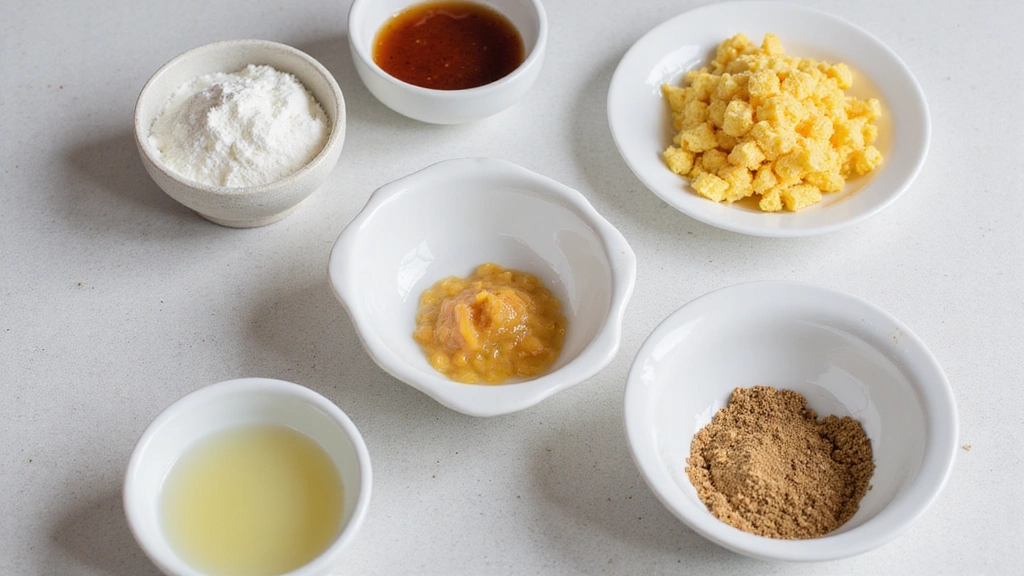
Ingredients
For the Dough
|
| Amount | Ingredient | Notes |
|---|---|---|
| 3.5 cups | bread flour | provides structure |
| 1.5 cups | water | room temperature for proper hydration |
| 2 teaspoons | salt | enhances flavor |
| 1 teaspoon | yeast | for leavening |
For Dusting
| Amount | Ingredient | Notes |
|---|---|---|
| 1 tablespoon | cornmeal | prevents sticking |
| 1 tablespoon | flour | for dusting surface |
Preparation Methods
Autolyse: This technique involves mixing flour and water and letting it rest before adding yeast and salt. It allows the flour to absorb water, making the dough easier to handle and resulting in a better texture.
Stretch and Fold: Instead of traditional kneading, this method gently stretches and folds the dough to build gluten structure. It’s crucial for achieving the desired airy crumb.
Cold Fermentation: Allowing the dough to ferment in the refrigerator overnight develops deeper flavor and improves texture by slowing down yeast activity.
Step 1: Prepare Ingredients
Measure and gather all ingredients before starting.
Ensure water is at room temperature for optimal yeast activity.
Sift flour to remove any lumps.
Clear a workspace for easy access to tools and ingredients.
Step 2: Mix the Dough
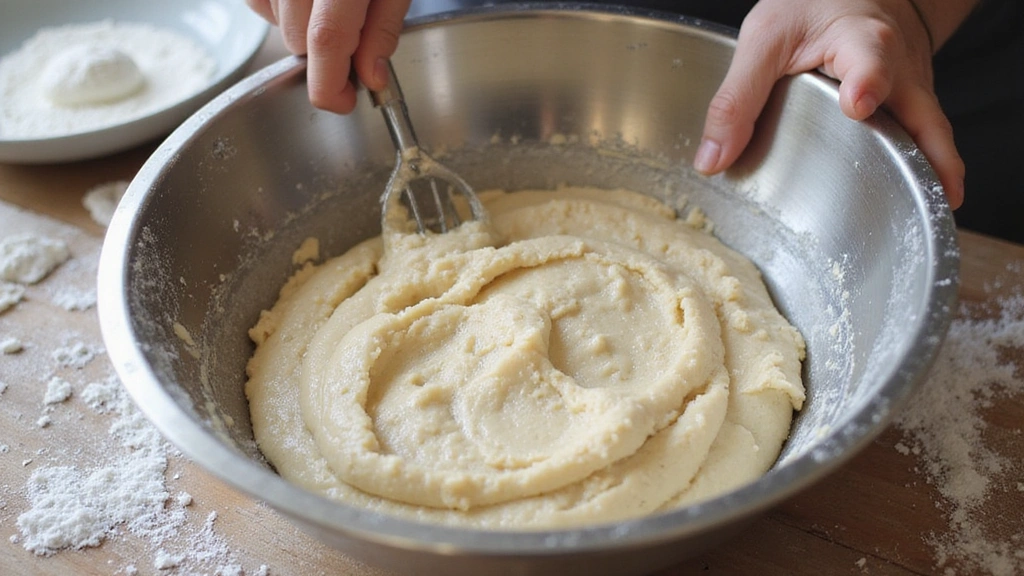
In a large mixing bowl, combine flour and water.
Stir until no dry streaks remain.
Cover with a damp cloth and let rest for 30 minutes.
This rest period is known as autolyse, allowing the flour to hydrate.
Step 3: Add Yeast and Salt

Sprinkle yeast and salt over the dough.
Gently mix by hand, folding the dough over itself.
Turn the bowl as you mix to ensure even distribution.
Continue until ingredients are fully incorporated.
Step 4: Perform Stretch and Fold
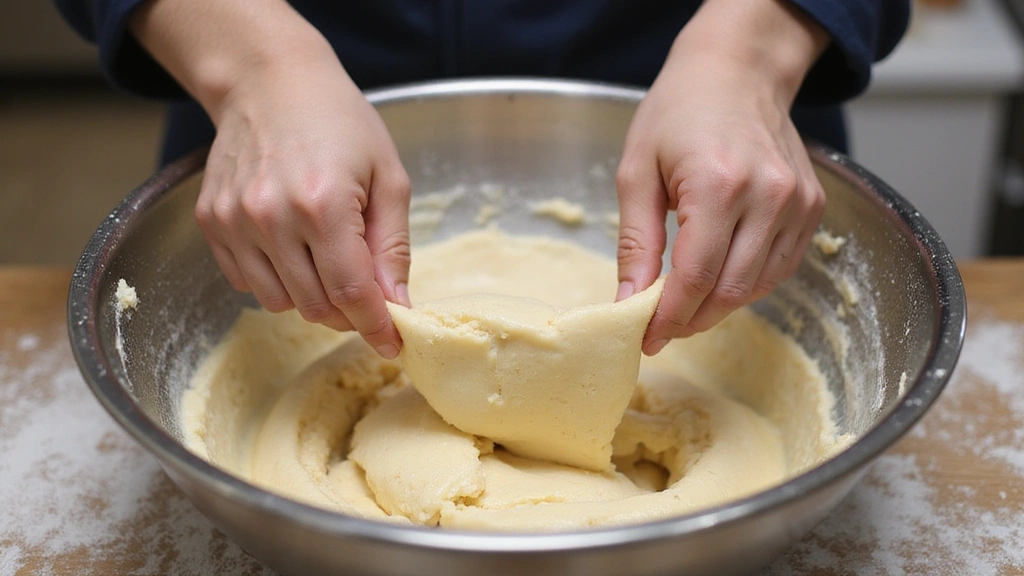
Every 30 minutes, stretch and fold the dough four times.
Lift one side, stretch it upward, and fold it over the center.
Rotate the bowl and repeat on all sides.
This builds gluten structure for an airy crumb.
Step 5: Allow Dough to Rise
Cover the bowl with a damp cloth and let the dough rise for 1-2 hours.
It should double in size and become bubbly.
Keep it in a warm, draft-free area.
This is the bulk fermentation stage.
Step 6: Shape the Dough
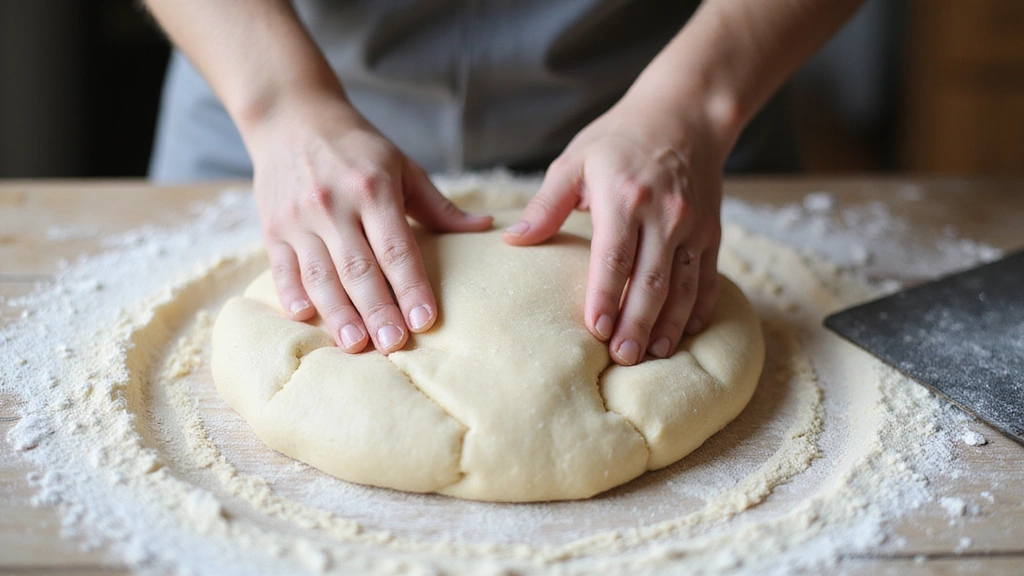
Lightly flour your work surface and turn the dough onto it.
Shape it into a round by folding the edges towards the center.
Flip the dough so the seam side is down.
Use a bench scraper to help shape and tighten the dough.
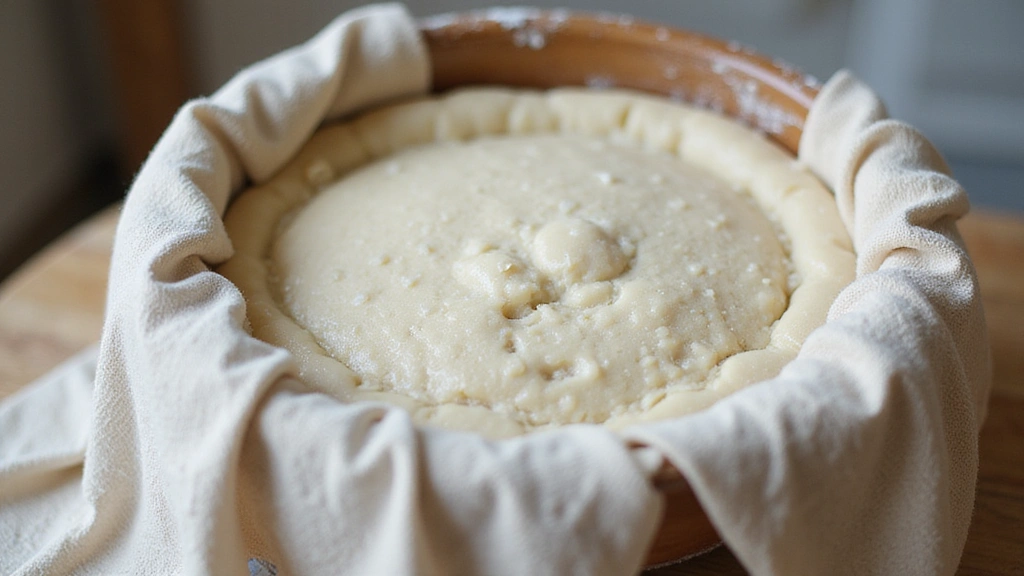
Step 7: Cold Fermentation
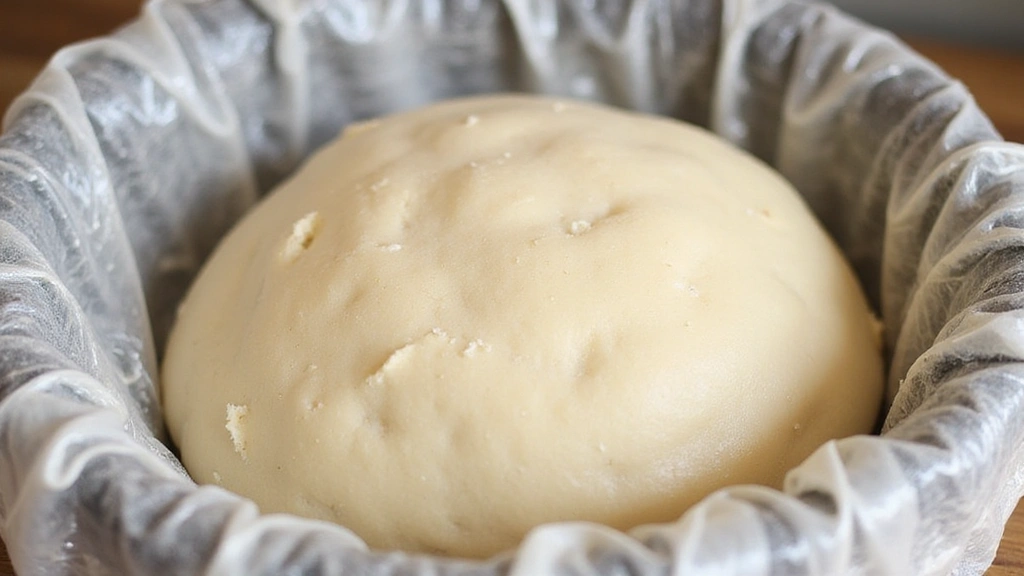
Place the shaped dough in a floured proofing basket.
Cover with a plastic wrap and refrigerate overnight.
This develops flavor and improves texture.
Remove from fridge 30 minutes before baking.
Step 8: Preheat the Oven
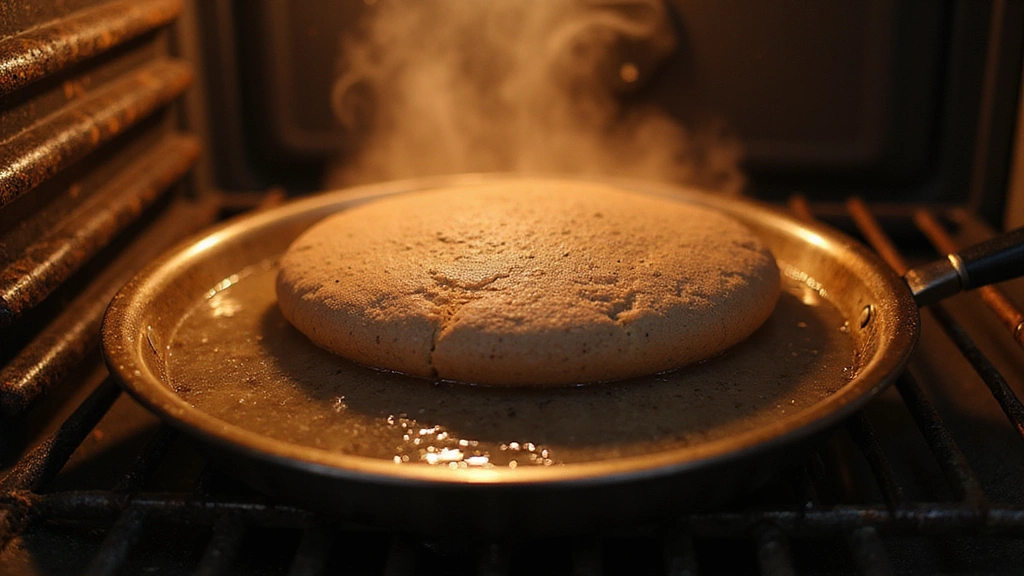
Preheat your oven to 475°F with a baking stone inside.
Place a pan of water at the bottom for steam.
This high heat and steam create a crispy crust.
Allow the oven to preheat for at least 30 minutes.
Step 9: Score the Dough
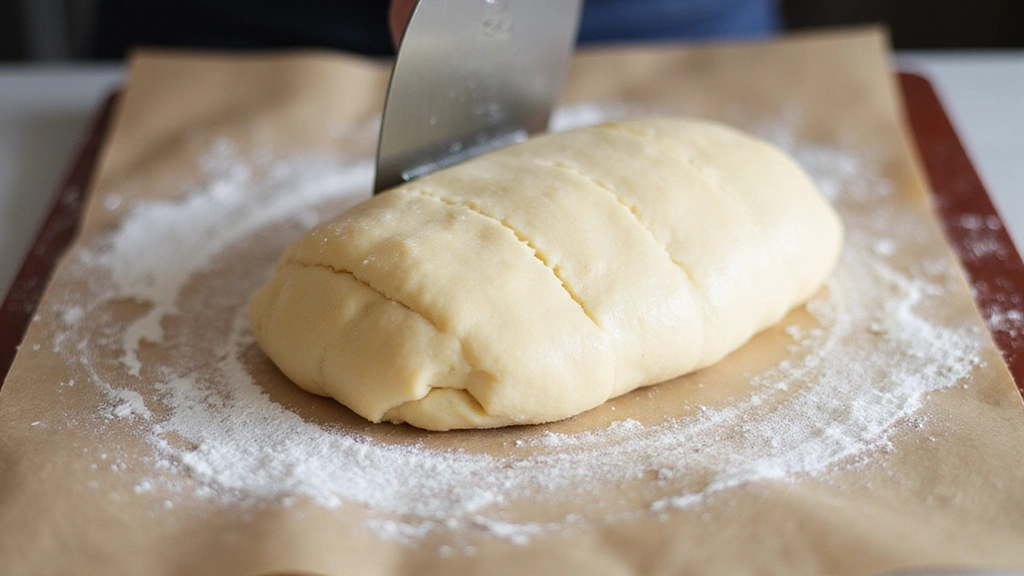
Remove dough from fridge and carefully turn it onto a cornmeal-dusted peel.
Use a sharp blade to score the top of the dough.
This allows steam to escape and controls expansion.
Make quick and confident cuts.
Step 10: Bake the Bread
Slide the dough onto the baking stone.
Bake at 475°F for 20 minutes with steam.
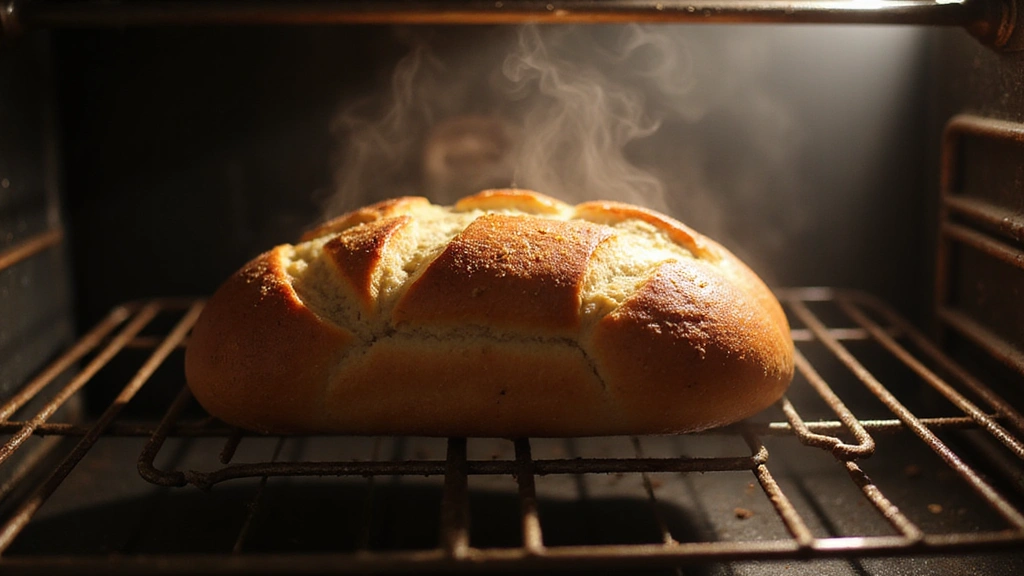
Reduce temperature to 450°F and bake for another 10 minutes.
Bread is done when crust is deep golden brown.
Step 11: Cool the Bread
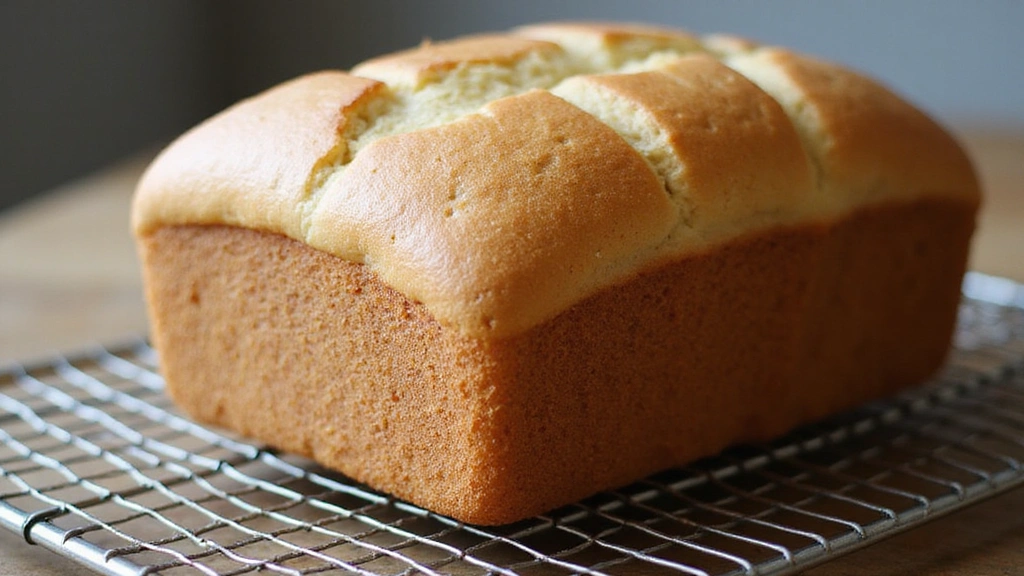
Remove bread from oven and place on a wire rack.
Let it cool completely before slicing.
This allows the crumb to set and flavor to develop.
Patience is key for the best texture.
Step 12: Serve and Enjoy
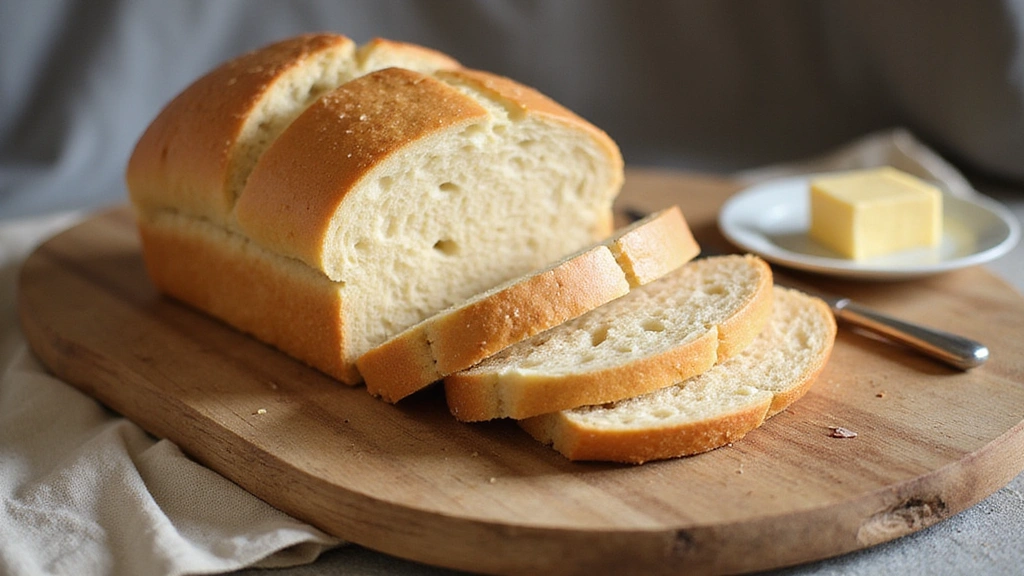
Slice the bread using a serrated knife.
Serve with butter or your favorite spread.
Enjoy the fruits of your labor with family and friends.
Relish in the satisfaction of homemade bread.
Critical Timing and Temperature Guide
Autolyse: Let the dough rest for 30 minutes after initial mixing; this rest is crucial for proper hydration and gluten formation.
Baking: Start baking at 475°F to ensure oven spring, then lower to 450°F; look for a deep brown crust as an indicator of doneness, avoiding underbaking which leads to a gummy interior.
Cold Fermentation: Ferment the dough in the refrigerator for at least 12 hours; longer fermentation results in better flavor but avoid exceeding 24 hours to prevent over-proofing.
Pro Tips for Bread Recipes Homemade
• Ingredient Selection: Choose high-quality bread flour for optimal gluten development, which is crucial for the bread's structure and chew.
• Preparation Secret: Use the autolyse method to improve dough extensibility without additional kneading.
• Temperature Management: Ensure your oven is thoroughly preheated to achieve a proper crust and oven spring.
• Texture Enhancement: Perform multiple stretch and folds to build a strong gluten network without overworking the dough.
• Flavor Layering: Incorporate a small amount of whole grain flour for depth of flavor without compromising the bread's lightness.
• Make-Ahead Strategies: Prepare the dough the day before and refrigerate overnight for a convenient and flavorful bake the next day.
• Restaurant-Quality Finishing Touches: Brush the loaf with melted butter after baking for a glossy finish and enhanced flavor.
• Equipment Optimization: Use a Dutch oven as an alternative to a baking stone for even heat distribution and steam trapping.
Troubleshooting Common Issues
• Texture Too Dense: This is often caused by insufficient fermentation or under-kneading. Ensure your dough rises adequately during bulk fermentation and that the gluten structure is well-developed through stretch and folds.
• Crust Too Hard: Overbaking or insufficient steam during the initial baking stage can cause this. Ensure your oven has adequate steam and monitor baking time closely.
• Dough Not Rising: Check your yeast for freshness and ensure the dough is kept in a warm environment during rising periods.
• Uneven Crumb: This can result from improper gluten development or uneven shaping. Be consistent with your stretch and folds and shape the dough carefully.
• Bland Flavor: Extend the fermentation time to develop more complex flavors. Consider adding a small amount of whole grain or rye flour.
• Overproofed Dough: Dough that has risen too long may collapse. Pay attention to visual indicators of readiness, such as a jiggly but not collapsing dough.
Variations and Regional Differences
• French Baguette: This version uses less hydration and is shaped into long, thin loaves with a crisp crust, typically made without any fat.
• Italian Ciabatta: Known for its open crumb and slightly higher hydration, this bread uses olive oil for added richness and a chewy texture.
• German Vollkornbrot: A dense, hearty bread made with whole grain rye flour, often including seeds for texture and flavor.
• Irish Soda Bread: A quick bread variation using baking soda as leavening, often incorporating buttermilk and caraway seeds.
Food Science Behind the Recipe
• Gluten Formation: The combination of water and flour allows gluten proteins to align and form a network, providing the dough with elasticity and strength.
• Yeast Fermentation: Yeast consumes sugars and produces carbon dioxide and alcohol, causing the dough to rise and develop flavor.
• Maillard Reaction: The high baking temperature initiates the Maillard reaction, which caramelizes the crust and enhances flavor complexity.
Frequently Asked Questions
What's the most common mistake people make when preparing artisan bread? Overlooking the importance of fermentation time is a frequent error. Proper fermentation is crucial for flavor and texture development.
Can I use all-purpose flour instead of bread flour? Yes, but the bread may have a slightly different texture due to the lower protein content in all-purpose flour.
Why is my crust not crispy? This could be due to insufficient oven heat or lack of steam during the initial baking phase. Ensure your oven is preheated and steam is present.
How do I know if my dough is ready to bake? The dough should be doubled in size, and when poked, it should hold the indentation without collapsing.
Can I add seeds or nuts to this recipe? Absolutely! Add them during the initial mixing stage for even distribution throughout the dough.
What's a good substitute for a baking stone? A heavy-duty baking sheet or a preheated Dutch oven can be used as an alternative.
How can I store leftover bread? Store it in a paper bag at room temperature for a few days or freeze for longer preservation.
Serving and Presentation Guide
• Traditional Presentation: Serve the bread warm, sliced on a wooden board with a side of butter or olive oil for dipping.
• Modern Twist: Present with an assortment of flavored butters or spreads for a contemporary touch.
• Rustic Appeal: Place the whole loaf on a rustic cloth or cutting board, allowing guests to tear off pieces themselves.
• Elegant Display: Slice the bread and arrange the pieces in a bread basket lined with decorative napkins.
Conclusion
Embark on the rewarding journey of artisan bread making with this detailed guide.
With patience and practice, you'll master the art of creating fresh, homemade bread that rivals your favorite bakery.
Share the joy and satisfaction of this culinary craft with family and friends, and enjoy the delicious results together.