


Focaccia bread is a culinary gem that embodies the rustic charm of Italian baking.
Its soft, fluffy interior paired with a slightly crisp exterior makes it a versatile addition to any meal.
The rich aroma of olive oil and herbs baked into the dough will transport you to the sun-drenched coasts of Italy.
Whether you’re a seasoned baker or a novice, this recipe provides a straightforward approach to crafting delicious focaccia at home.
Perfect for mopping up sauces or as a simple snack, this bread is sure to become a family favorite.
The History and Cultural Significance
• Focaccia Bread Recipe traces its origins to Ancient Rome, where it was originally created by Roman bakers.
• The dish evolved over decades as regional ingredients were incorporated, eventually becoming the beloved version we know today.
• In Italy, this dish traditionally appears at festive occasions and family gatherings, symbolizing warmth and togetherness.
• While many variations exist across different regions, the authentic version maintains a chewy texture and rich flavor that sets it apart from imitations.
Recipe Overview
Nutritional Information (per serving)
Essential Equipment Guide
Stand Mixer: A stand mixer is essential for kneading the dough to achieve the perfect gluten structure, which results in a soft and airy bread. If you don’t have a stand mixer, you can knead by hand, but it will require more effort. Look for a mixer with a dough hook attachment.
Baking Pan: A high-quality baking pan ensures even heat distribution, which is critical for achieving a crispy crust. A non-stick pan or a well-oiled cast iron skillet can serve as alternatives. Choose a pan with at least a 1-inch depth to accommodate the rising dough.
Silicone Spatula: A silicone spatula is useful for mixing and transferring sticky dough without tearing it. While a wooden spoon can be an alternative, silicone is preferred for its flexibility and ease of cleaning. Opt for a spatula with a sturdy handle for better control.
Ingredients
For the Dough
|
| Amount | Ingredient | Notes |
|---|---|---|
| 4 cups | all-purpose flour | sifted for light texture |
| 2 teaspoons | salt | enhances flavor |
| 1 tablespoon | sugar | feeds the yeast |
| 2 1/4 teaspoons | active dry yeast | for leavening |
| 1 1/2 cups | warm water | activates yeast |
| 1/4 cup | olive oil | adds moisture and flavor |
For Topping
| Amount | Ingredient | Notes |
|---|---|---|
| 2 tablespoons | olive oil | creates a crispy crust |
| 1 teaspoon | coarse sea salt | for flavor and texture |
| 1 tablespoon | fresh rosemary | adds aroma and flavor |
Preparation Methods
Proofing Yeast: This technique involves dissolving yeast in warm water with sugar to activate it. It's crucial for ensuring the yeast is alive and will help the dough rise. To master this, ensure the water is between 105°F and 115°F, and look for a foamy surface after 5-10 minutes.
Kneading Dough: Kneading develops the gluten network necessary for the bread's structure. It involves folding and pressing the dough repeatedly. To achieve the best results, knead until the dough is smooth and elastic, about 8-10 minutes by hand or 5 minutes with a mixer.
Second Rise: Allowing the dough to rise a second time in the baking pan ensures it reaches its final airy texture. During this phase, cover the dough with a damp cloth and let it rest in a warm place until it doubles in size, about 1 hour. This step is crucial for achieving the characteristic focaccia texture.
Step 1: Activate the Yeast
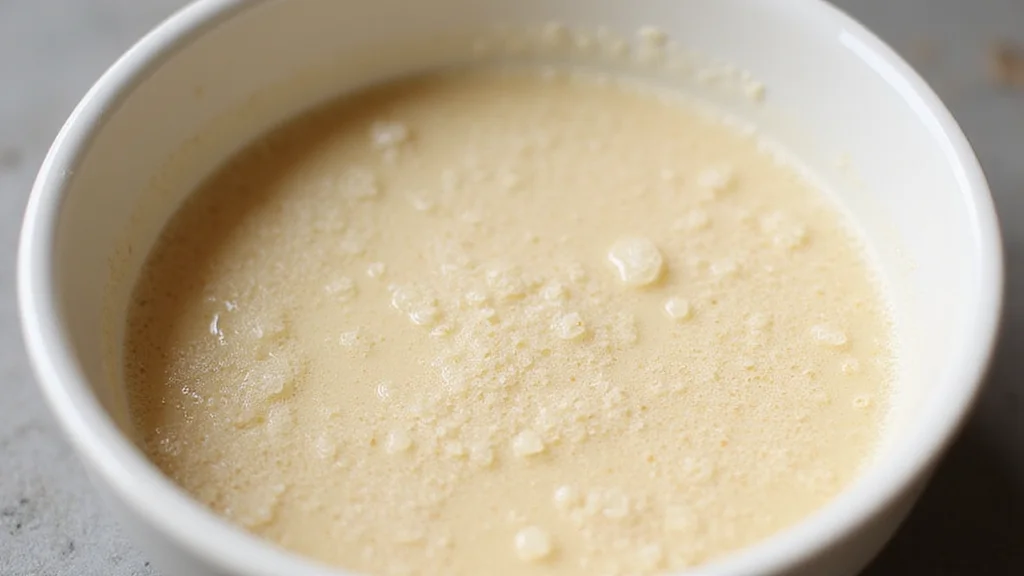
Combine warm water, sugar, and yeast in a small bowl.
Stir gently to dissolve the yeast.
Let the mixture sit for 5-10 minutes until foamy.
This indicates that the yeast is active and ready to use.
Step 2: Mix the Dough
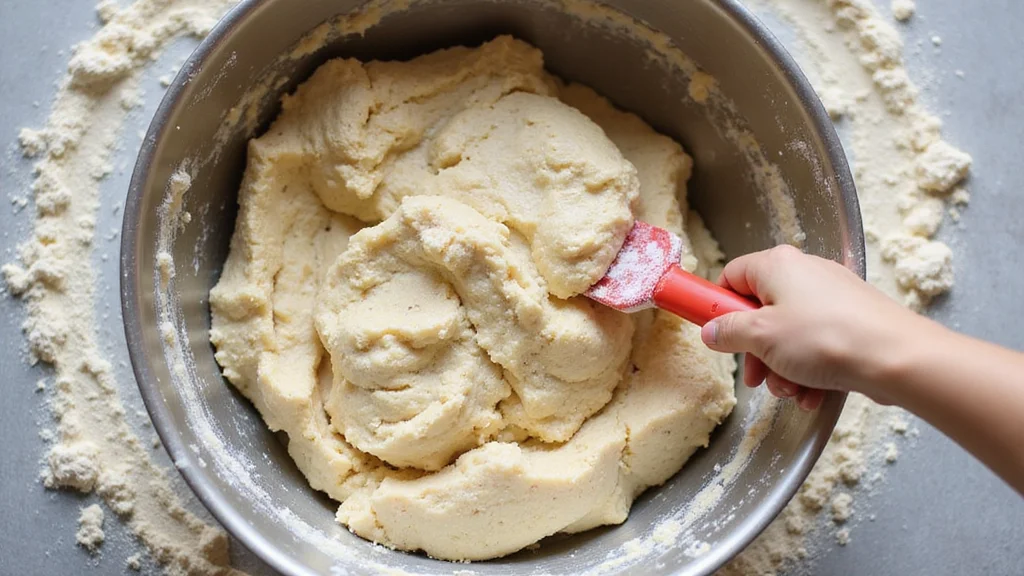
In a large mixing bowl, combine flour and salt.
Add the yeast mixture and olive oil to the dry ingredients.
Stir with a silicone spatula until a shaggy dough forms.
Ensure all flour is incorporated and the dough starts to pull away from the sides.
Step 3: Knead the Dough
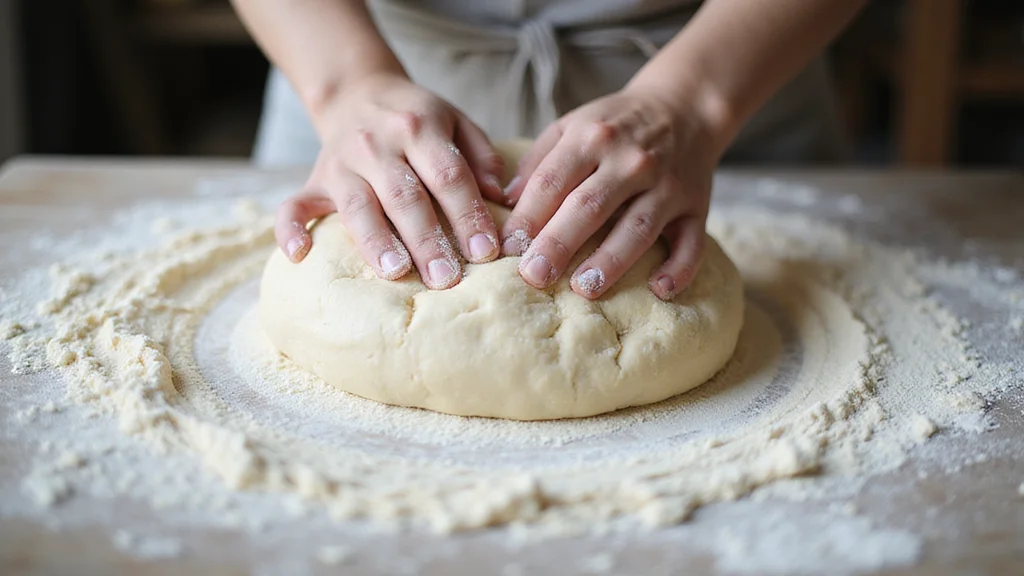
Transfer the dough onto a floured surface.
Knead by hand for 8-10 minutes until smooth and elastic.
Alternatively, use a stand mixer with a dough hook for 5 minutes.
The dough should be soft and slightly tacky but not sticky.
Step 4: First Rise
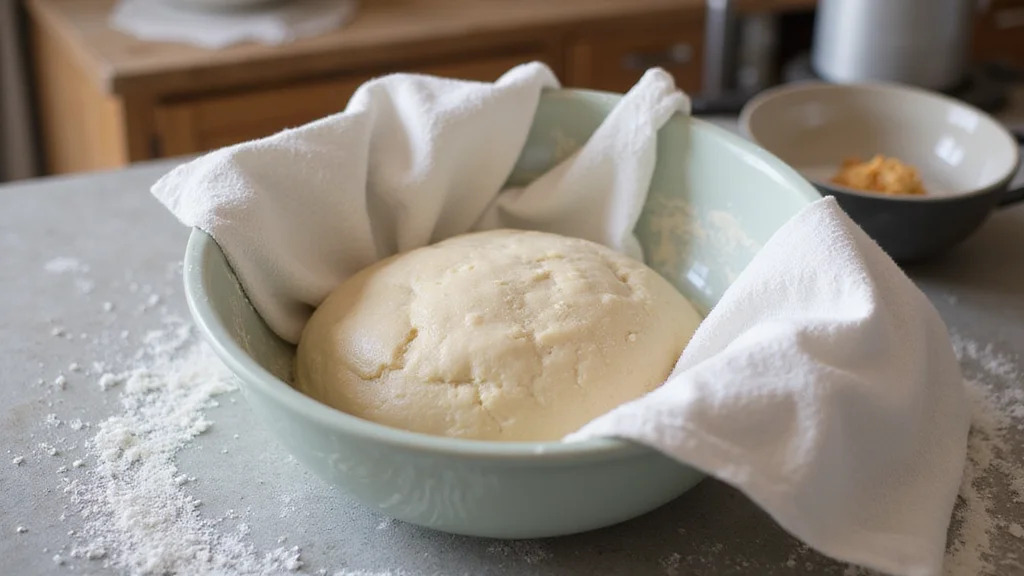
Place the dough in a lightly oiled bowl.
Cover with a damp cloth and let rise in a warm place.
Allow it to double in size, about 1 hour.
This rise develops flavor and texture in the dough.
Step 5: Prepare Baking Pan
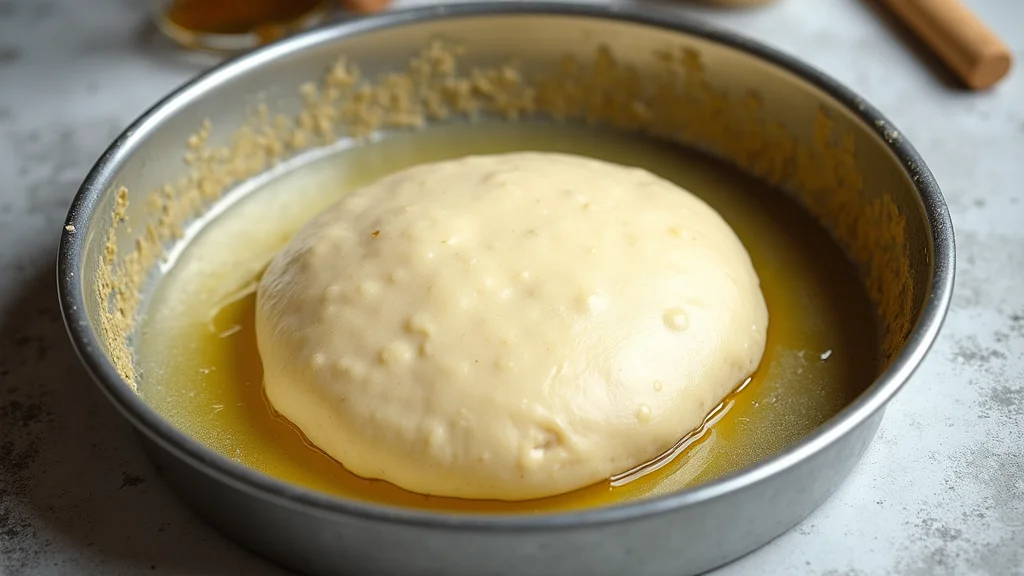
Grease a baking pan with olive oil.
Ensure the entire surface is evenly coated.
This prevents sticking and aids in crust formation.
Use a brush or paper towel for even distribution.
Step 6: Shape the Dough
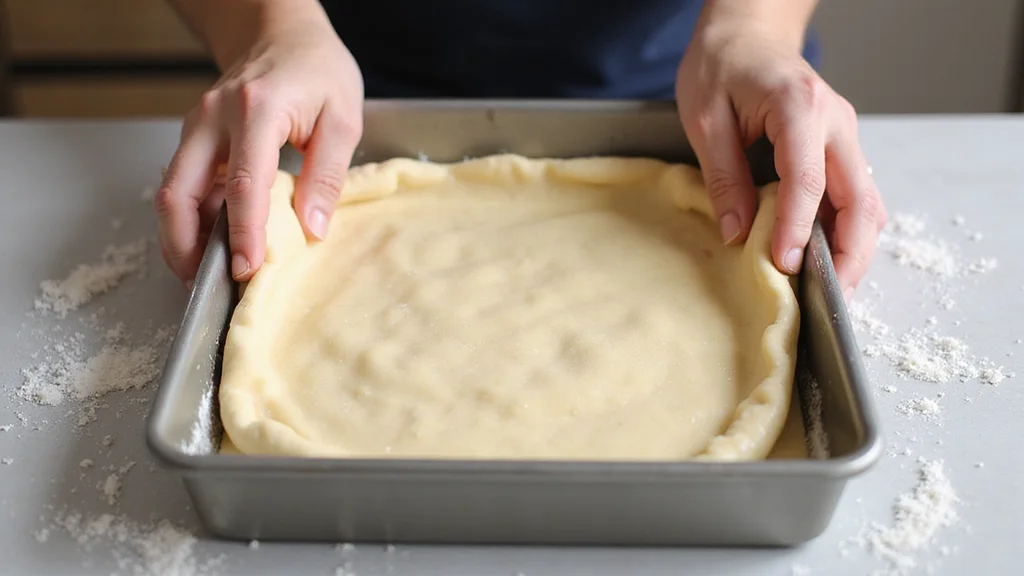
Transfer the risen dough to the prepared pan.
Gently stretch and press the dough to fill the pan.
Avoid tearing the dough while spreading.
The dough should fit snugly without any gaps.
Step 7: Second Rise
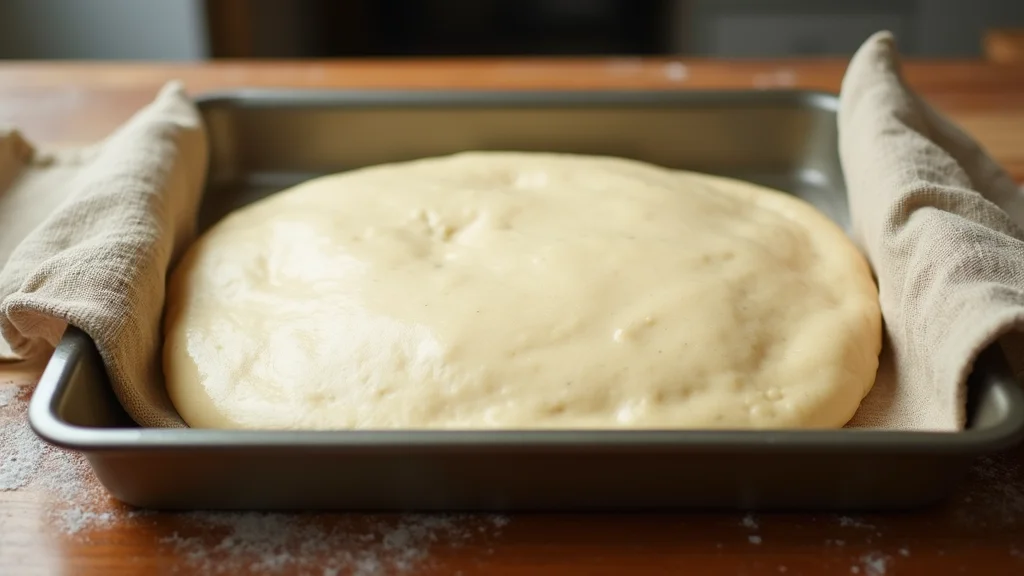
Cover the pan with a damp cloth.
Allow the dough to rise again for about 1 hour.
It should double in size and become airy.
This rise is crucial for light and fluffy focaccia.
Step 8: Add Toppings
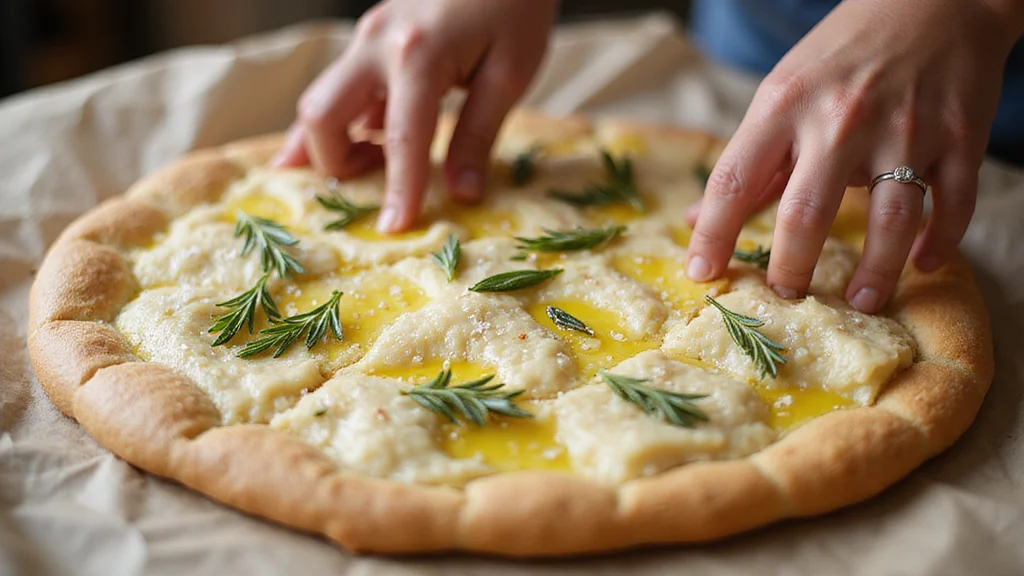
Preheat the oven to 425°F (220°C).
Drizzle olive oil over the risen dough.
Sprinkle with coarse sea salt and rosemary.
Press dimples into the surface with your fingers to hold the toppings.
Step 9: Bake the Focaccia
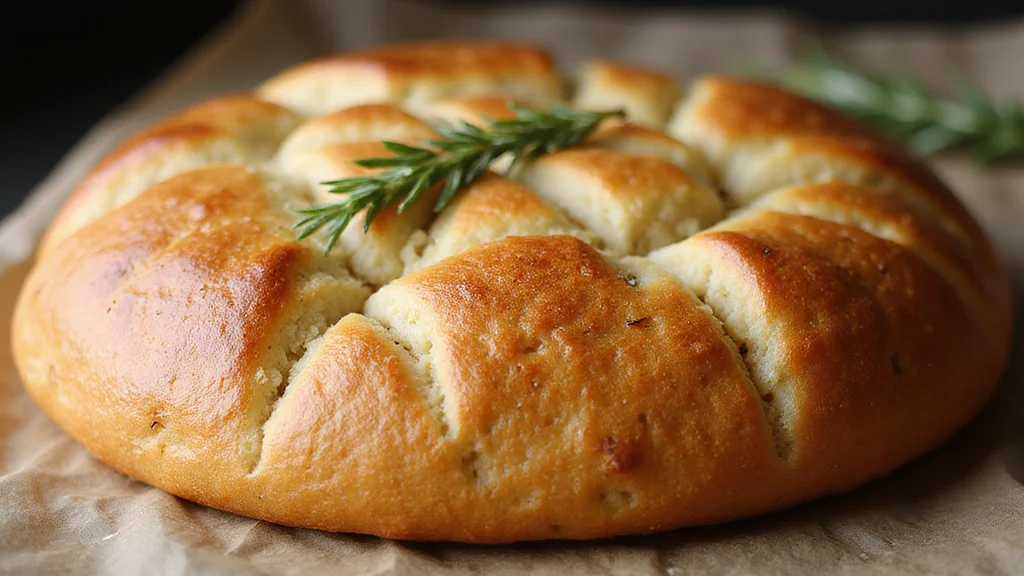
Place the pan in the preheated oven.
Bake for 20-25 minutes until golden brown.
The crust should be crispy, and the interior soft.
Remove from the oven and let cool slightly before serving.
Critical Timing and Temperature Guide
Yeast Activation: Ensure the water temperature is between 105°F and 115°F. If it's too hot, it will kill the yeast. The mixture should become foamy; otherwise, the yeast may be inactive.
Dough Rising: Both rises should occur in a warm, draft-free environment. Aim for a temperature around 75°F. If the dough isn't rising, it could be too cold or the yeast might be inactive.
Baking: The oven should be preheated to 425°F. Bake until the top is golden brown and crispy. Avoid opening the oven frequently, as it can affect the baking temperature.
Pro Tips for Focaccia Bread Recipe
• Ingredient Selection: Use high-quality olive oil and fresh rosemary for the best flavor. These ingredients significantly impact the final taste of the focaccia.
• Preparation Secret: Allow the dough to rest in the refrigerator overnight for improved flavor development.
• Temperature Management: Keep the dough warm during rising by placing the bowl in a slightly warm oven (turned off) to ensure optimal yeast activity.
• Texture Enhancement: Create deep dimples with your fingers to hold the toppings and enhance the bread's texture.
• Flavor Layering: Infuse olive oil with garlic or herbs for added richness before drizzling over the dough.
• Make-Ahead Strategies: Prepare the dough a day in advance and refrigerate it for slow fermentation, enhancing flavor and texture.
• Restaurant-Quality Finishing Touches: Brush the baked focaccia with a little more olive oil and a sprinkle of sea salt before serving for a professional look.
• Equipment Optimization: If using a stand mixer, occasionally scrape down the sides to ensure even mixing and kneading.
Troubleshooting Common Issues
• Dense Texture: This could be due to under-kneading or inactive yeast. Ensure the dough is kneaded until smooth and elastic, and check yeast expiration for activity.
• Flat Bread: If the dough doesn't rise, it might be too cold or the yeast may be dead. Use fresh yeast and allow for proper proofing in a warm environment.
• Bland Flavor: Without enough salt, focaccia can taste bland. Ensure the correct amount of salt is used in the dough and topping.
• Overly Dark Crust: Baking at too high a temperature can cause this. Verify oven temperature with an oven thermometer and adjust baking time if necessary.
• Sticky Dough: This may occur if the dough is too wet. Add a small amount of flour until the dough becomes manageable.
• Toppings Falling Off: Ensure toppings are pressed into the dough's dimples before baking, which helps them adhere during baking.
Variations and Regional Differences
• Genoese Focaccia: This version is thinner and crispier, often brushed with olive oil and sprinkled with coarse salt before baking.
• Barese Focaccia: Originating from Bari, this variation includes cherry tomatoes and olives, creating a savory and tangy combination.
• Focaccia al Rosmarino: A simple yet popular style featuring rosemary and coarse salt, perfect as a side dish or snack.
• Sweet Focaccia: In some regions, focaccia is made with sugar and topped with fruits or nuts, serving as a dessert option.
Food Science Behind the Recipe
• Gluten Development: Kneading the dough aligns gluten proteins, creating a network that traps gas and gives the bread structure. Understanding this helps achieve the desired texture.
• Yeast Fermentation: Yeast consumes sugars, producing carbon dioxide and alcohol, which help the dough rise. Proper fermentation is essential for flavor and texture.
• Maillard Reaction: This is the chemical reaction that occurs during baking, giving focaccia its brown crust and complex flavors. Controlling baking temperature and time enhances this effect.
Frequently Asked Questions
What's the most common mistake people make when preparing focaccia? Not allowing sufficient time for both rises, which can result in a dense and heavy bread.
Can I use whole wheat flour instead of all-purpose flour? Yes, but it will alter the texture and flavor, making it denser. Consider using a mix of whole wheat and all-purpose flour.
How do I store leftover focaccia? Wrap it in foil or plastic wrap and store at room temperature for up to two days. For longer storage, freeze it.
Can I add different toppings? Absolutely! Focaccia is versatile and can be topped with anything from cheese to vegetables.
Why is my focaccia not crispy? Ensure the oven is fully preheated and use a high-quality baking pan for even heat distribution.
What can I serve with focaccia? It pairs wonderfully with soups, salads, or as a base for sandwiches.
Why did my focaccia turn out too salty? Be cautious with the amount of salt used in both the dough and as a topping. Adjust according to taste preferences.
Serving and Presentation Guide
• Traditional Presentation: Serve the focaccia in squares or wedges on a rustic wooden board, showcasing its golden crust and toppings.
• Gourmet Presentation: Pair with a selection of olive oils and balsamic vinegar for dipping, arranged elegantly on a platter.
• Casual Presentation: Simply place on a large plate lined with a checkered napkin, perfect for family-style dining.
• Appetizer Presentation: Cut into small bite-sized pieces and serve with toothpicks as a part of an appetizer spread.
Conclusion
Creating homemade focaccia is a rewarding endeavor that brings the flavors of Italy to your kitchen.
With this guide, you'll master the art of making soft, fluffy, and delicious focaccia.
Embrace the process, and soon you'll be sharing this delectable bread with family and friends.
Enjoy the satisfaction of baking a timeless classic that never fails to impress.