


The journey of creating a sourdough starter is as rewarding as it is fascinating.
With its tangy aroma and chewy texture, sourdough bread offers a distinct taste experience that is hard to forget.
I first fell in love with this process during a chilly autumn, when the warmth of the kitchen and the smell of fermenting dough was comforting.
Crafting your own sourdough starter is a fulfilling endeavor that connects you to a timeless tradition.
Whether you’re a seasoned baker or a novice in the kitchen, this guide will help you create a sourdough starter with ease.
The History and Cultural Significance
• Sourdough traces its origins to ancient Egypt, where it was accidentally discovered by leaving dough out to ferment.
• The dish evolved over decades as new grains and techniques were introduced, eventually becoming the beloved version we know today.
• In many cultures, sourdough bread traditionally appears at family gatherings and celebrations, symbolizing nourishment and shared heritage.
• While many variations exist across different regions, the authentic version maintains a natural leavening process that sets it apart from imitations.
Recipe Overview
Nutritional Information (per serving)
Essential Equipment Guide
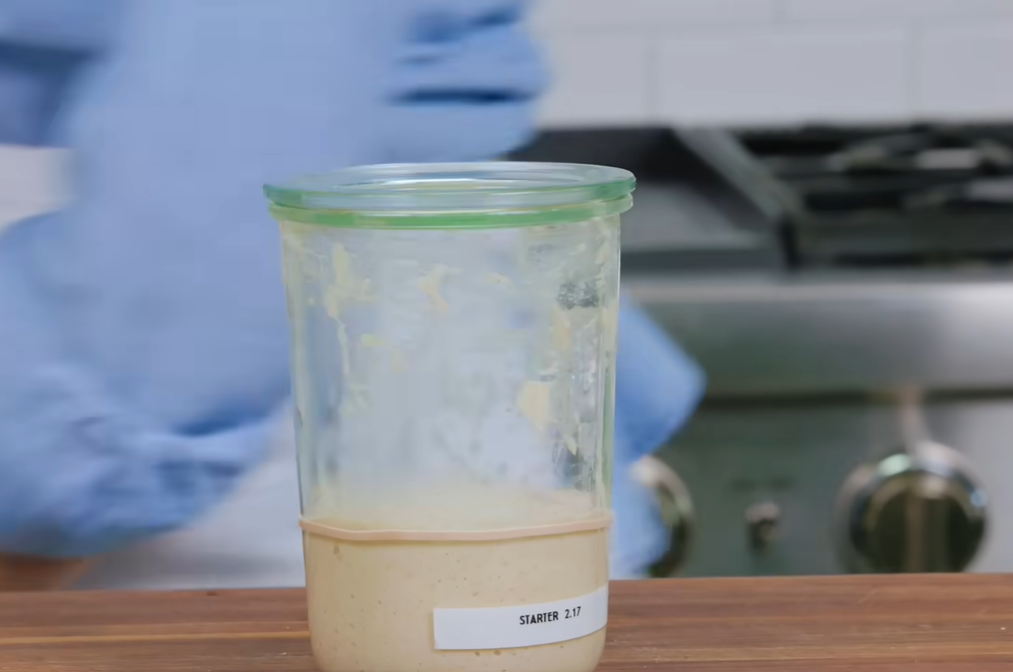
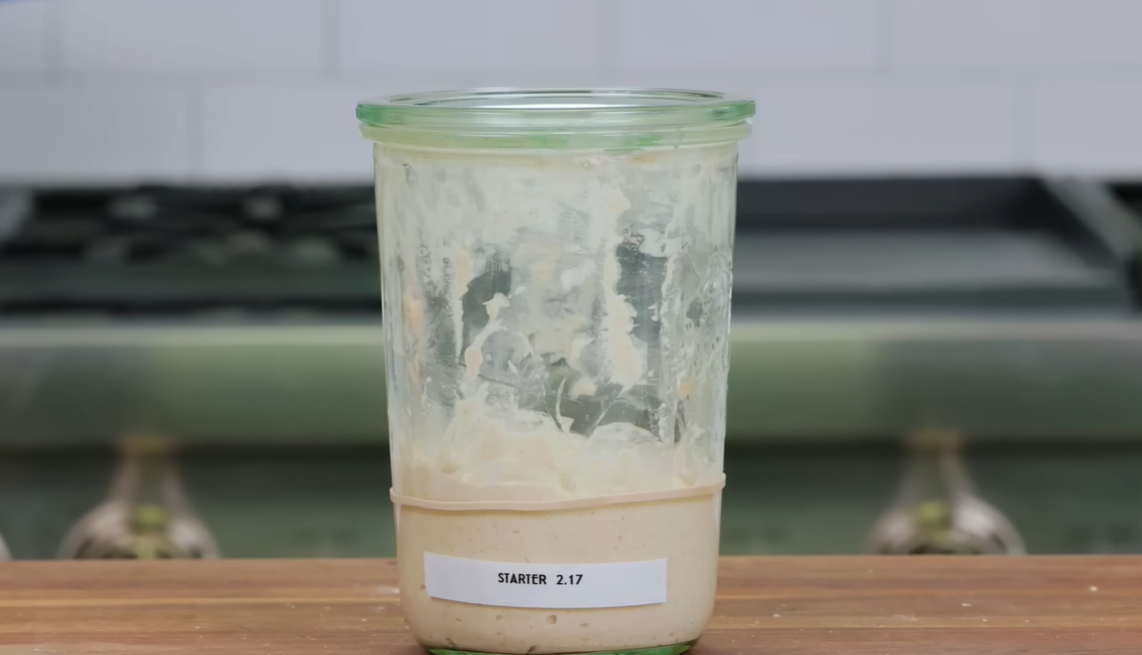
Glass Jar: A glass jar is essential for observing the growth and activity of your starter. It should be large enough to allow for expansion and have a loose-fitting lid to let gases escape.
Kitchen Scale: Precision in measurements is crucial for maintaining the balance of flour and water. A digital kitchen scale ensures accuracy, which is vital for a healthy starter.
Mixing Spoon: A sturdy mixing spoon helps incorporate flour and water evenly. Wooden or silicone spoons are preferable to avoid any metallic reactions with the starter.
Ingredients
For the Starter
| Amount | Ingredient | Notes |
|---|---|---|
| 1 cup | whole wheat flour | provides natural yeasts and nutrients |
| 1 cup | water | filtered, room temperature, for hydration |
Preparation Methods
Fermentation: This process involves allowing wild yeasts and bacteria to develop in the flour-water mixture, which is essential for leavening the bread. Ensure the starter is kept at a consistent temperature for optimal results.
Feeding: Regularly adding flour and water encourages the growth of the starter. It’s crucial to follow a consistent feeding schedule to maintain an active and healthy starter.
Discarding: Removing some of the starter before feeding prevents it from growing too large and helps maintain its acidity, which enhances flavor and texture in the final bread.
Step 1: Combine Ingredients
Add 1 cup of whole wheat flour to a glass jar.
Pour in 1 cup of filtered, room temperature water.
Stir the mixture until it forms a smooth batter with no lumps.
Cover the jar loosely with a lid or cloth.
Step 2: Allow to Ferment
Place the jar in a warm area of your kitchen.
Let it sit undisturbed for 24 hours.
Look for bubbles forming on the surface, indicating fermentation is starting.
Keep the jar covered loosely to allow gases to escape.
Step 3: Check and Feed
After 24 hours, check the starter for activity such as bubbles or a tangy smell.
If signs of fermentation are present, discard half of the mixture.
Add in another 1 cup of flour and 1 cup of water.
Mix well until smooth and cover again loosely.
Step 4: Repeat Feeding
Continue feeding the starter every 24 hours, discarding half each time.
Mix in fresh flour and water thoroughly.
Look for increased bubbling and rising in the starter over time.
Keep the jar in a consistently warm place.
Step 5: Monitor Progress
After several days, the starter should consistently double in size between feedings.
It will develop a pleasant, tangy aroma.
Check for a frothy surface and a stretchy, bubbly texture inside.
These indicators show that your starter is mature and active.
Step 6: Adjust Feeding Schedule
Once mature, reduce feeding to once every 12 hours if baking frequently.
For less frequent use, store in the refrigerator and feed weekly.
Revive refrigerated starter by bringing it to room temperature and feeding before use.
This ensures the starter remains healthy and ready to leaven bread.
Step 7: Ready for Baking
When your starter is active and bubbly, it's ready to use in bread recipes.
Use it as a natural leavening agent instead of commercial yeast.
Experiment with different flours and hydration levels for varied flavors.
Enjoy the unique taste and texture of homemade sourdough.
Step 8: Maintain Your Starter
Keep your starter fed regularly to maintain its activity.
Store it in the fridge when not in use, feeding weekly.
Always bring to room temperature and feed before baking.
This keeps it strong and flavorful for future baking endeavors.
Critical Timing and Temperature Guide
Fermentation: Maintain a temperature of 70-75°F for optimal yeast activity. Look for bubbling and a sour aroma as signs of proper fermentation. Avoid temperatures above 80°F, which can cause over-fermentation.
Feeding: Feed the starter every 12-24 hours based on room temperature and activity level. Ensure the starter doubles in size within 4-6 hours after feeding. Avoid skipping feedings which can starve the yeast.
Refrigeration: When storing in the fridge, feed the starter weekly and allow it to warm up before feeding. Signs of dormancy include little to no bubbling. Avoid prolonged storage without feeding to prevent spoilage.
Pro Tips for a Delicious Sourdough
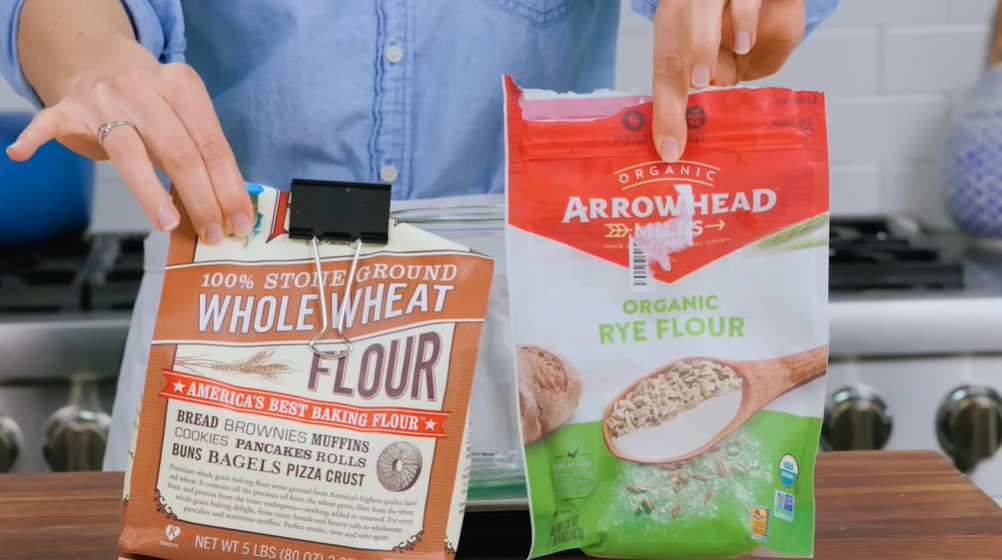
• Ingredient Selection: Use high-quality whole wheat flour for the starter, as it contains more nutrients that encourage yeast growth.
• Preparation Secret: Stir the starter vigorously during feedings to incorporate air, which promotes yeast activity.
• Temperature Management: Keep your starter at a consistent temperature for best results, avoiding temperature swings.
• Texture Enhancement: Achieve a chewy texture by allowing the dough to rest and develop gluten fully before baking.
• Flavor Layering: Use a mix of different flours such as rye or spelt in the starter to add depth and complexity to the flavor.
• Make-Ahead Strategies: Prepare extra starter and freeze it in small portions for future use, thawing and feeding it back to life when needed.
• Restaurant-Quality Finishing Touches: Brush the crust with water before baking for a glossy finish and bake with steam for an artisan crust.
• Equipment Optimization: Use a bench scraper for efficient mixing and handling of dough, ensuring minimal sticking.
Troubleshooting Common Issues
• Starter Not Bubbling: If the starter shows no signs of activity, ensure it's kept at a warm temperature and feed regularly. Consider using a different type of flour that may contain more natural yeasts.
• Starter Too Watery: If the starter is too liquid, adjust the flour-to-water ratio slightly until a thicker consistency is achieved. This helps maintain structure and activity.
• Off Smell: A strong, unpleasant odor can indicate spoilage. Discard half the starter, feed with fresh ingredients, and ensure the jar is clean.
• Slow Growth: If the starter isn't doubling in size, it might be too cold. Move it to a warmer spot or increase feeding frequency.
• Mold on Starter: If mold appears, it's best to discard the starter and begin anew. Ensure all equipment is sanitized and the starter is stored properly.
• Starter Separation: Liquid on top (hooch) indicates hunger. Stir in or pour off the liquid and feed the starter to revitalize it.
Variations and Regional Differences
• San Francisco Style: Known for its unique tangy flavor, this variation uses local wild yeasts and bacteria, which thrive in the Bay Area's climate, influencing the starter's taste.
• Rye Sourdough: Common in Northern Europe, this version uses rye flour, resulting in a denser and darker bread with a unique, earthy flavor.
• Spelt Sourdough: Popular in Germany, this variation incorporates spelt flour, providing a nutty taste and softer texture.
• Whole Wheat Sourdough: This variation emphasizes whole wheat flour, producing a heartier loaf with a higher fiber content.
Food Science Behind the Recipe
• Yeast Fermentation: The wild yeasts in flour consume sugars and produce carbon dioxide, causing the dough to rise. Understanding this process helps optimize conditions for yeast activity.
• Gluten Development: During fermentation, gluten proteins form a network that traps gases, providing structure. Proper mixing and resting enhance this network.
• Acid Production: Lactic acid bacteria produce acids that give sourdough its tangy flavor and act as natural preservatives, extending shelf life.
Frequently Asked Questions
What's the most common mistake people make when preparing a sourdough starter? Neglecting the feeding schedule is the most common mistake. Regular feeding is crucial for maintaining an active and healthy starter.
Can I use all-purpose flour instead of whole wheat flour? Yes, you can use all-purpose flour, but whole wheat flour provides more nutrients and natural yeasts, which can be beneficial for starter development.
How do I know if my starter is ready to use? A ready starter will double in size within 4-6 hours after feeding and have a pleasant tangy aroma with visible bubbles.
What if my starter develops a crust on top? A crust can form if the starter is exposed to air for too long. Stir it back in or remove it, and ensure the jar is covered loosely.
How can I make my sourdough more tangy? Allowing the starter to ferment longer between feedings can increase the acidity, enhancing the tanginess.
Can I revive a neglected starter? Yes, a neglected starter can often be revived with regular feedings and a warm environment over several days.
Is it safe to use a starter that has separated? Yes, separation is normal and indicates hunger. Stir the liquid back in and feed the starter to restore its balance.
Serving and Presentation Guide
• Traditional Presentation: Serve sliced sourdough on a wooden board with a side of butter and sea salt, enhancing its rustic appeal.
• Modern Twist: Pair sourdough with artisan cheeses and charcuterie for a contemporary appetizer spread.
• Seasonal Flair: Top slices with seasonal fruits or vegetables, like avocado or heirloom tomatoes, for a fresh and vibrant presentation.
• Minimalist Approach: Present the loaf whole on a simple, neutral-colored platter, emphasizing the bread's natural beauty.
Conclusion
Embarking on the sourdough starter journey is a rewarding exploration of flavors and techniques.
With patience and care, you'll nurture a starter that brings a unique taste to your bread.
Whether you're baking for friends or simply enjoying a slice at home, your homemade sourdough will surely impress.
Embrace the process and savor the delicious results of your efforts.