


There’s something undeniably satisfying about the crispy, savory taste of pork belly.
Whether you’re familiar with this delicacy or trying it for the first time, its rich flavors are bound to captivate your palate.
I was introduced to pork belly during a festive gathering, where it was the star of the show, impressing every guest with its melt-in-the-mouth texture.
The beauty of pork belly lies in its versatility, making it perfect for both casual dinners and extravagant celebrations.
With the right techniques and ingredients, you can achieve restaurant-quality results at home.
Dive into this guide to discover how to make the most out of this beloved ingredient.
The History and Cultural Significance
• Pork Belly Recipes: traces its origins to ancient China, where it was originally created by villagers using simple cooking techniques.
• The dish evolved over decades as chefs began experimenting with spices and cooking methods, eventually becoming the beloved version we know today.
• In Korean culture, this dish traditionally appears at family gatherings and celebrations, symbolizing prosperity and togetherness.
• While many variations exist across different regions, the authentic version maintains a perfect balance of crispy skin and tender meat that sets it apart from imitations.
Recipe Overview
Nutritional Information (per serving)
Essential Equipment Guide
Roasting Rack: A roasting rack is crucial for ensuring even cooking by allowing heat to circulate around the pork belly. An alternative could be a wire rack placed over a baking sheet. Look for a rack that fits your baking tray and can support the weight of the meat.
Sharp Knife: A sharp knife is essential for scoring the skin of the pork belly, which helps achieve a crispy texture. If you don’t have a chef’s knife, a utility knife can work. Ensure it is well-sharpened to make clean cuts.
Instant-Read Thermometer: This tool helps monitor the internal temperature of the meat to ensure doneness. A digital thermometer is preferred for accuracy, but an analog version can suffice.
Ingredients
For the Pork Belly
|
| Amount | Ingredient | Notes |
|---|---|---|
| 1.5 kg | pork belly | preferably with skin on |
| 1 tablespoon | salt | for seasoning |
| 1 teaspoon | black pepper | freshly ground |
For the Marinade
| Amount | Ingredient | Notes |
|---|---|---|
| 2 tablespoons | soy sauce | adds umami depth |
| 1 tablespoon | honey | for a hint of sweetness |
| 2 cloves | garlic | minced |
| 1 teaspoon | ginger | grated |
For the Glaze
| Amount | Ingredient | Notes |
|---|---|---|
| 1 tablespoon | brown sugar | for caramelization |
| 1 tablespoon | rice vinegar | adds acidity |
| 1 teaspoon | sesame oil | for a nutty aroma |
Preparation Methods
Scoring the Skin: Scoring involves making shallow cuts on the pork skin, which promotes even cooking and crispiness. It matters because it allows fat to render and skin to crisp. Use a sharp knife and make parallel cuts about 1 cm apart without cutting into the meat.
Marinating: Marinating the pork belly infuses it with flavor. This technique is essential for tenderizing the meat and enhancing taste. Ensure the marinade covers all surfaces and let it sit for at least an hour.
Slow Roasting: Slow roasting is cooking the pork at a low temperature for an extended time. This method is crucial for breaking down fat and achieving a tender texture. Ensure the oven is preheated and maintain a consistent temperature.
Step 1: Prepare Ingredients

Gather all the ingredients listed for the recipe.
Make sure the pork belly is at room temperature before starting.
Prepare the marinade by mixing soy sauce, honey, garlic, and ginger.
Set aside the ingredients for the glaze.
Step 2: Score the Pork Belly
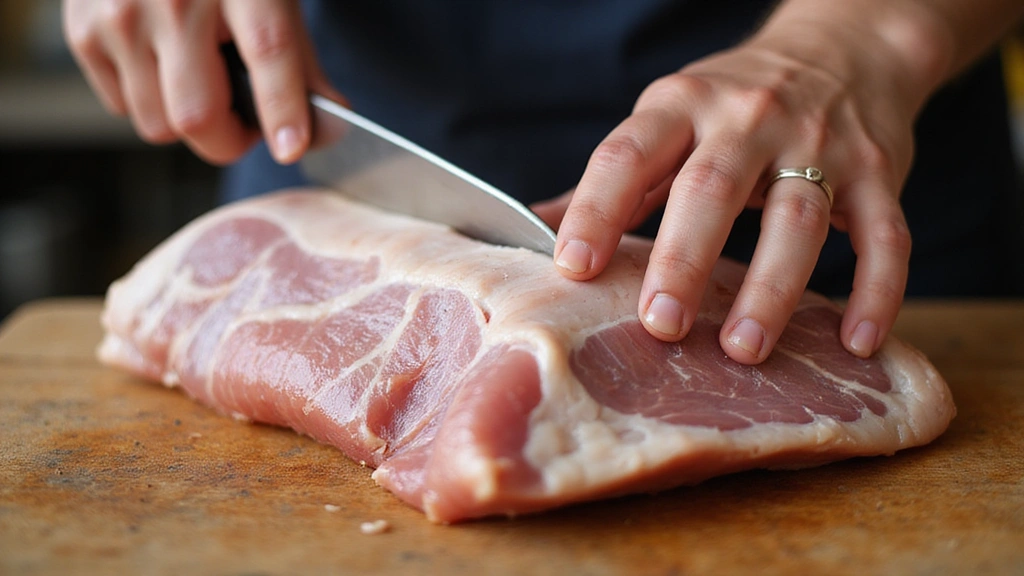
Place the pork belly skin-side up on a cutting board.
Use a sharp knife to make shallow cuts across the skin.
Ensure cuts are evenly spaced without cutting into the meat.
Pat the skin dry with paper towels.
Step 3: Season the Pork Belly
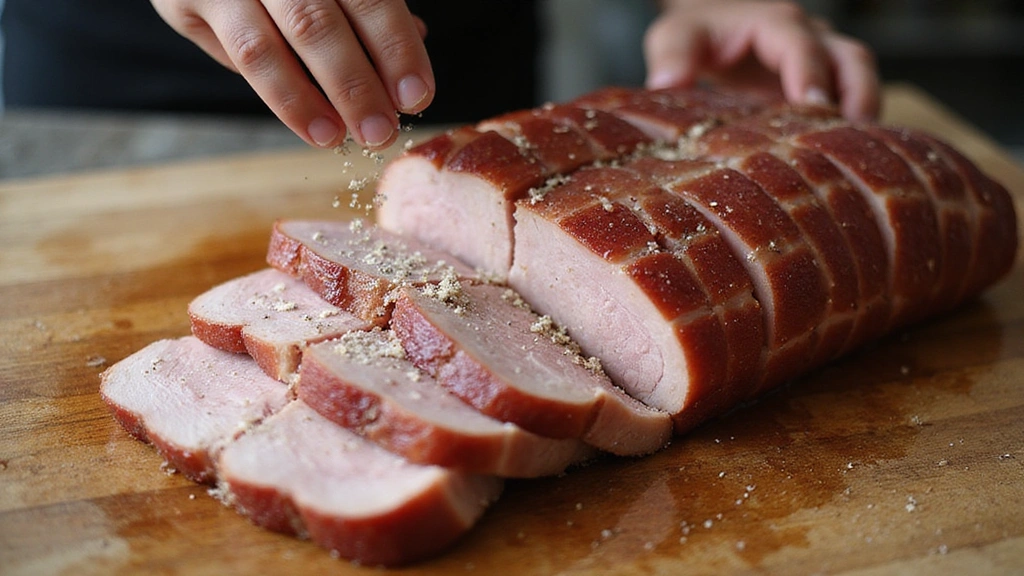
Rub salt and pepper into the scored skin.
Ensure seasoning gets into the cuts for maximum flavor.
Flip the pork belly and season the underside.
Let it sit for about 10 minutes to absorb flavors.
Step 4: Marinate the Pork Belly
Place the pork belly in a large dish or resealable bag.
Pour the prepared marinade over the pork belly.
Ensure all surfaces are coated with the marinade.
Refrigerate for at least 1 hour or overnight for best results.
Step 5: Preheat the Oven
Preheat your oven to 150°C (300°F).
Ensure the oven rack is in the middle position.
Prepare a roasting pan with a rack inside.
Line the bottom of the pan with foil for easy cleanup.
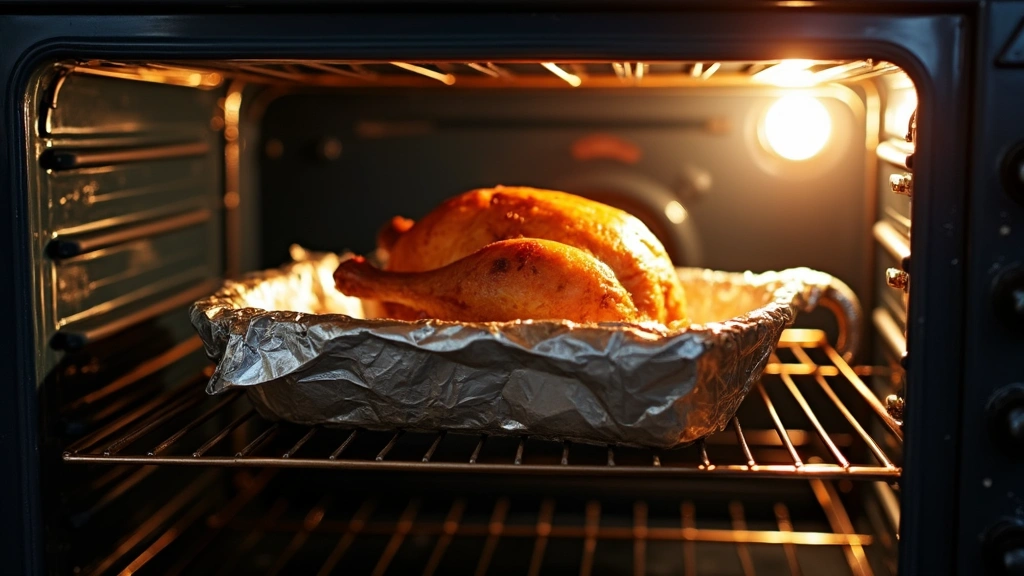
Step 6: Roast the Pork Belly
Remove pork belly from the marinade and place it on the roasting rack.
Ensure the skin is facing up.
Roast in the oven for about 2 hours.
Check occasionally to ensure it is cooking evenly.
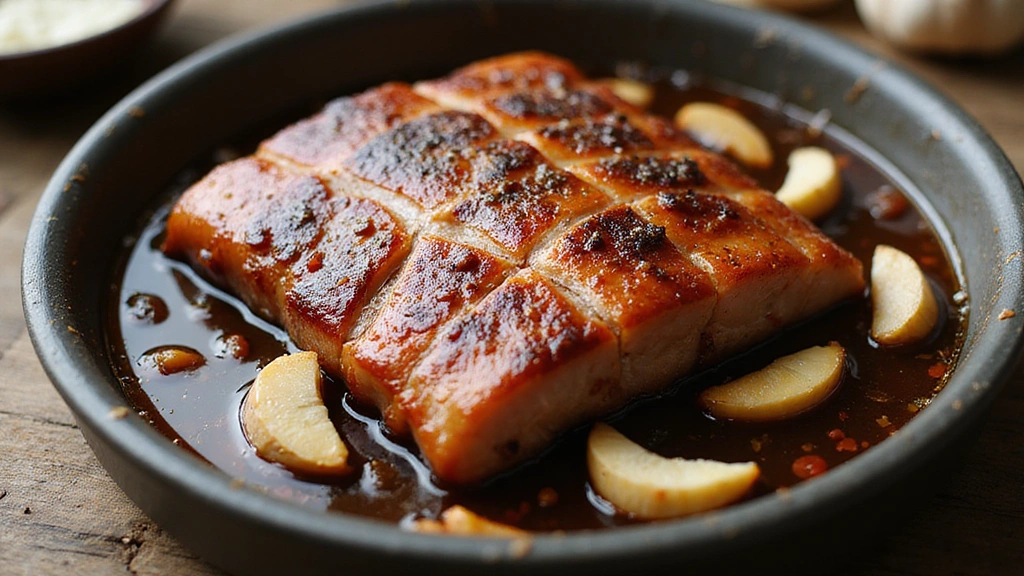
Step 7: Prepare the Glaze

While the pork is roasting, mix brown sugar, rice vinegar, and sesame oil in a small bowl.
Stir until the sugar is dissolved.
Set aside until ready to use.
Ensure the glaze is well combined.
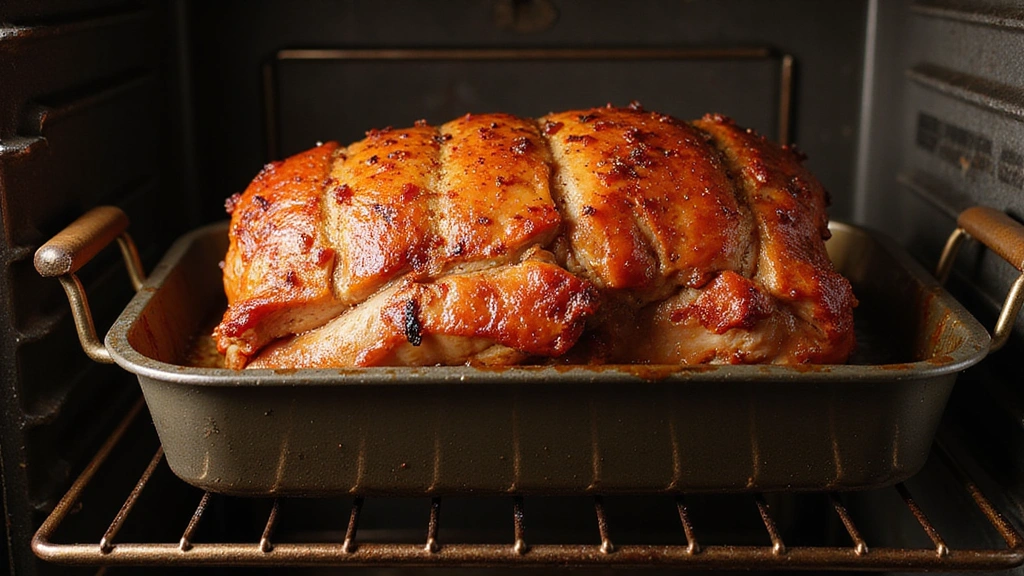
Step 8: Increase Oven Temperature for Crisping
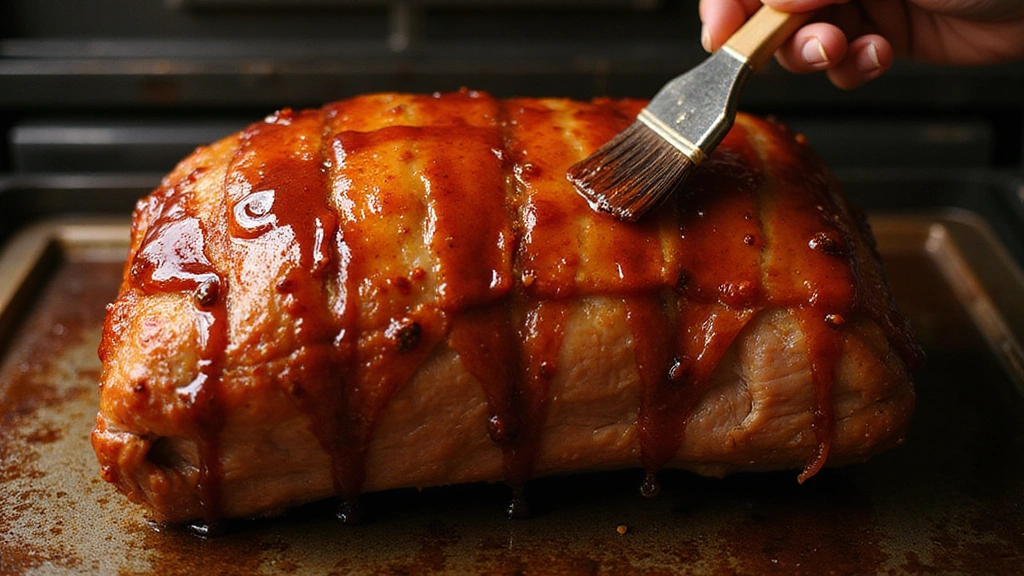
After 2 hours, increase the oven temperature to 220°C (430°F).
Brush the prepared glaze over the pork belly skin.
Return to the oven and roast for an additional 20-30 minutes.
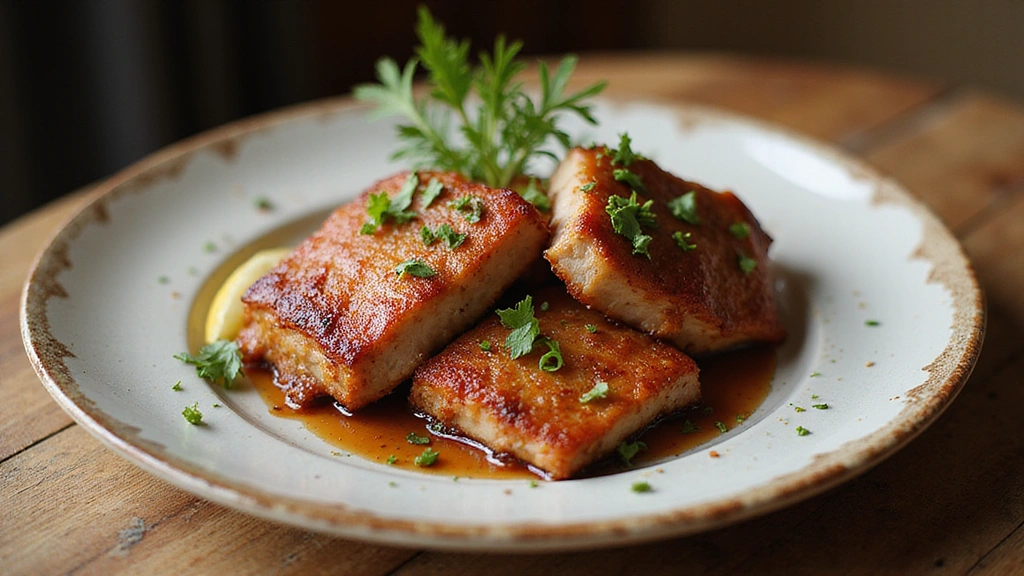
Check for a deep golden color and crisp skin.
Critical Timing and Temperature Guide
Initial Roasting: Roast the pork belly at 150°C (300°F) for 2 hours. The fat should render, and the meat should be tender. Avoid opening the oven door frequently to maintain temperature.
Final Crisping: Increase the oven to 220°C (430°F) for 20-30 minutes. The skin should bubble and turn golden brown. Avoid burning by monitoring closely.
Resting Period: Allow the pork belly to rest for 10 minutes before slicing. This ensures juices are redistributed, preventing dry meat.
Pro Tips for Pork Belly Recipes
• Ingredient Selection: Opt for high-quality, fresh pork belly with a good layer of fat. The freshness and fat content significantly impact the final flavor and texture.
• Preparation Secret: Dry the skin thoroughly before cooking to achieve a crispy texture. This step is often overlooked but is crucial for crispy skin.
• Temperature Management: Ensure the pork belly is at room temperature before cooking to promote even cooking.
• Texture Enhancement: Scoring the skin helps render the fat and achieve that coveted crunch.
• Flavor Layering: Use a combination of sweet and savory elements in the marinade to build complex flavors.
• Make-Ahead Strategies: Marinate the pork belly a day in advance for deeper flavor penetration. Store in the refrigerator and cover tightly.
• Restaurant-Quality Finishing Touches: Garnish with sliced green onions and sesame seeds before serving for a professional look.
• Equipment Optimization: Use a roasting rack to elevate the pork belly, allowing air circulation and even cooking.
Troubleshooting Common Issues
• Texture Not Crispy: This can be caused by insufficient drying of the skin. Ensure the skin is thoroughly patted dry before roasting. If already cooked, return it to a hot oven or under a grill for a few minutes.
• Meat Too Dry: Overcooking at high temperatures can lead to dryness. Stick to recommended temperatures and resting times.
• Flavors Unbalanced: Too much sweetness can overpower the dish. Adjust the amount of honey or sugar based on taste preferences.
• Uneven Cooking: Occurs if the pork belly is not at room temperature before cooking. Let it sit out of the fridge for at least 30 minutes before roasting.
• Burnt Glaze: This happens when the glaze is applied too early. Apply glaze only during the final high-temperature roasting phase.
Variations and Regional Differences
• Chinese-Style Variation: Typically includes five-spice powder and Shaoxing wine in the marinade, and is often served with steamed buns.
• Korean-Style Samgyeopsal: Slices of pork belly are grilled and served with lettuce wraps, ssamjang, and kimchi.
• Italian Porchetta: A rolled version of pork belly with herbs like rosemary and fennel, roasted until the skin is crispy.
• Filipino Lechon Kawali: Deep-fried pork belly served with a side of liver sauce or vinegar dipping sauce.
Food Science Behind the Recipe
• Maillard Reaction: Responsible for the browning and flavor development in the pork skin when roasted at high temperatures.
• Fat Rendering: Slow cooking at low temperatures helps fat to melt away, leaving tender meat and crispy skin.
• Brining Effect: Salt in the marinade helps break down proteins, resulting in tender meat.
Frequently Asked Questions
What's the most common mistake people make when preparing pork belly? Not drying the skin thoroughly before cooking, which prevents it from crisping up.
Can I use a different cut of pork? Pork shoulder or butt can be used, but the texture and cooking time will differ.
Is it necessary to marinate overnight? While not mandatory, marinating overnight enhances flavor significantly.
How do I store leftovers? Store in an airtight container in the refrigerator for up to 3 days. Reheat in the oven to maintain crispiness.
Can I make this recipe without a roasting rack? Yes, but a rack helps ensure even cooking. Alternatives include a wire rack over a baking sheet.
What can I do if the skin doesn't crisp? Increase the oven temperature or use a broiler for a few minutes, watching closely to avoid burning.
How do I prevent the glaze from burning? Apply glaze only during the last few minutes of cooking at high temperature.
Serving and Presentation Guide
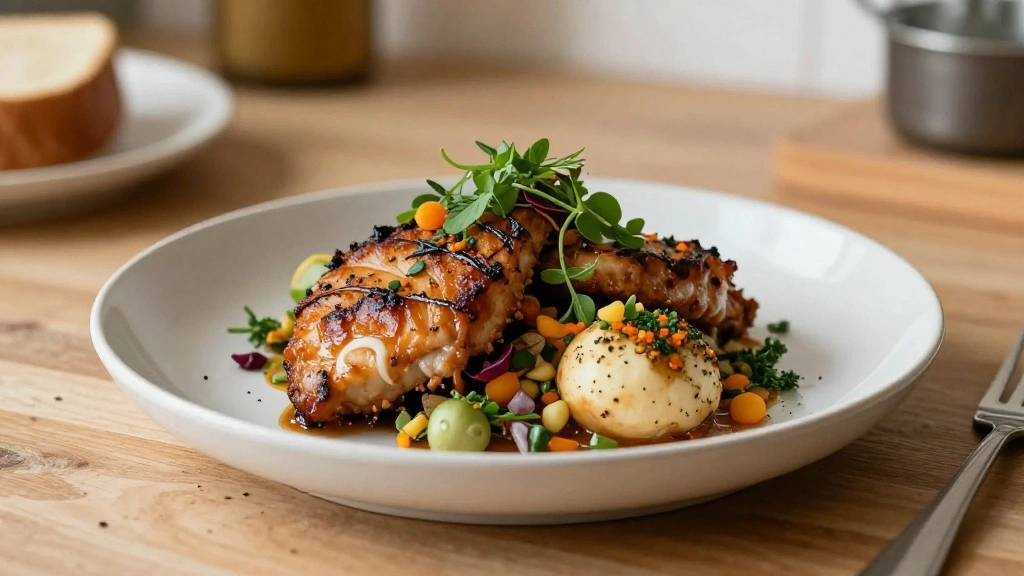
• Traditional Presentation: Serve pork belly sliced into thick pieces, arranged neatly on a platter, garnished with green onions and sesame seeds.
• Modern Plating: Serve slices over a bed of sautéed greens or mashed potatoes, with a drizzle of glaze on top.
• Casual Style: Slice into smaller pieces for a buffet-style serving, paired with dipping sauces.
• Family Style: Present on a large wooden board with sides like rice and roasted vegetables, allowing guests to serve themselves.
Conclusion
Pork belly is a versatile ingredient that can transform any meal into a gourmet experience.
By following these detailed instructions and tips, you'll impress your guests with a dish that's both delicious and visually appealing.
Don't hesitate to experiment with flavors and techniques to make this recipe your own.
Enjoy the process and savor the rewarding results of your culinary efforts.